12 Free DIY Quilt Rack Plans You Can Make Today (with Pictures)
-
- Last updated:
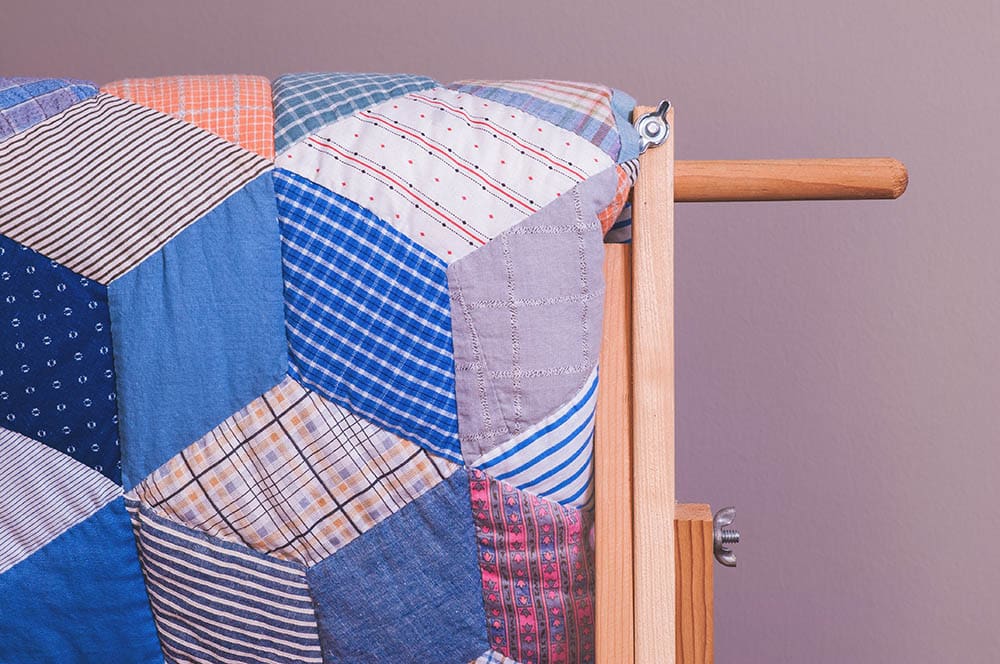

A well-built quilt rack is useful in all kinds of situations. You might have bought a quilt that’s so beautiful you intend to display it rather than use it. Maybe you’re always cold, and need to have a lot of blankets within reach. Maybe you’re sick of your family leaving clothes on the floor, but want a user-friendly rack that can double as decoration.
As a DIY project, quilt racks run the gamut: some are easy to hack together in an afternoon with scrap wood, while others require a weekend in the workshop and mastery of completely new woodworking techniques. No matter what difficulty level you go for, though, we guarantee you’ll have fun learning how to build a quilt rack of your own.
If you’re ready to add a touch of old-time luxury to your living space, check out one of these DIY quilt rack ideas you can download and get started on right now.

The Top 12 DIY Quilt Rack Plans
1. Standing DIY Quilt Rack by Four Oaks Crafts

We’ll start things off with this design for a classic standing quilt rack by Four Oaks Crafts, a blog maintained by professional woodworker Stephen Johnson that draws on his 25 years of experience. This broad-sided, freestanding quilt rack can be built in a day, and includes a heart design that makes it a great present.
- Tape measure
- Pencil
- Hand drill
- Jig saw
- Sander or sandpaper
- Wooden planks, at least ¾” thick
- Wooden buttons
- Wood screws
- Stain
- Finish
2. DIY Blanket Rack by Wayne of the Woods
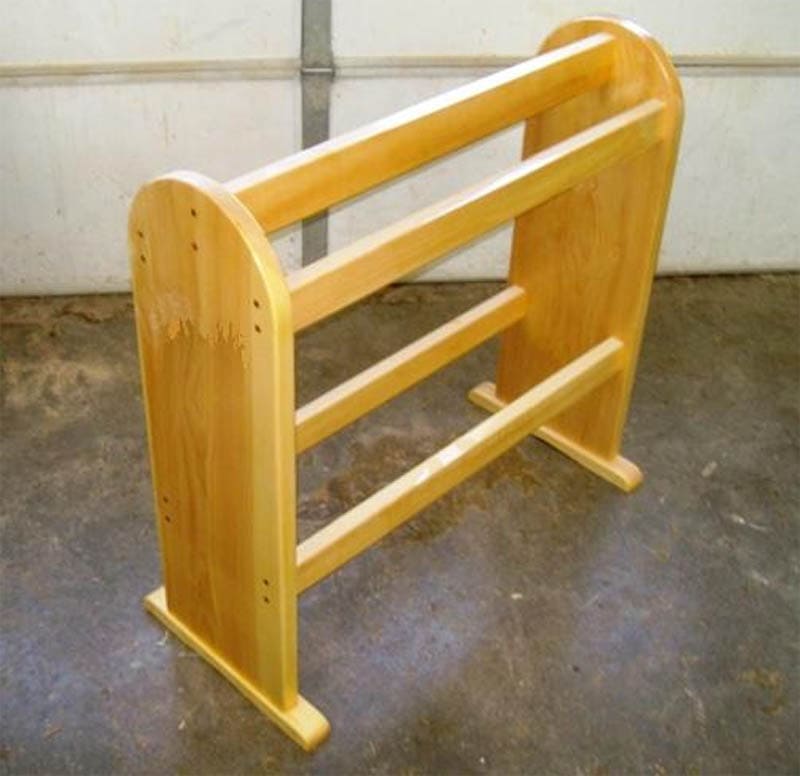
Wayne of the Woods, an unassuming site with a big selection of exciting woodworking plans, offers this quilt rack design for anybody who wants to build a rack without the fuss. You can build this rack out of four pieces of wood, and a few other materials, for a total of about $60.
- Tape measure
- Pencil
- Compass
- Table saw
- Miter saw
- Bandsaw
- Sander
- Router
- Power drill/screwdriver
- (3) 8-foot 2x4s
- (1) 8-foot 1×12
- Wood plugs
- Wood screws
- Polyurethane
- Wood glue
3. Modern DIY Quilt Rack by Ana White
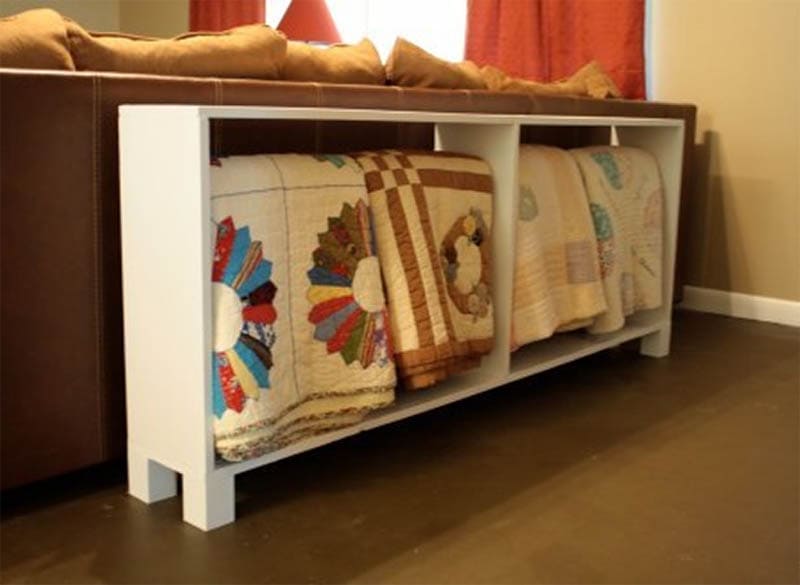
Ana White‘s quilt rack is multifunctional, serving as both a quilt display and a side table. It’s great for filling that long stretch of wall you don’t quite know what to do with.
The steps for building it are intuitive — start by threading a dowel through the three upright pieces, then add the rest of the planks around that frame. If you have all the tools, the total cost hovers around $30 (paint not included).
- Tape measure
- Speed square
- Pencil
- Hammer
- Drill
- Circular saw
- Sander
- Level
- (3) 6-foot 1x10s
- (1) 2-foot 2×2
- (1) 6-foot dowel, 1 inch thick
- Screws
4. DIY Blanket Ladder by Shanty 2 Chic
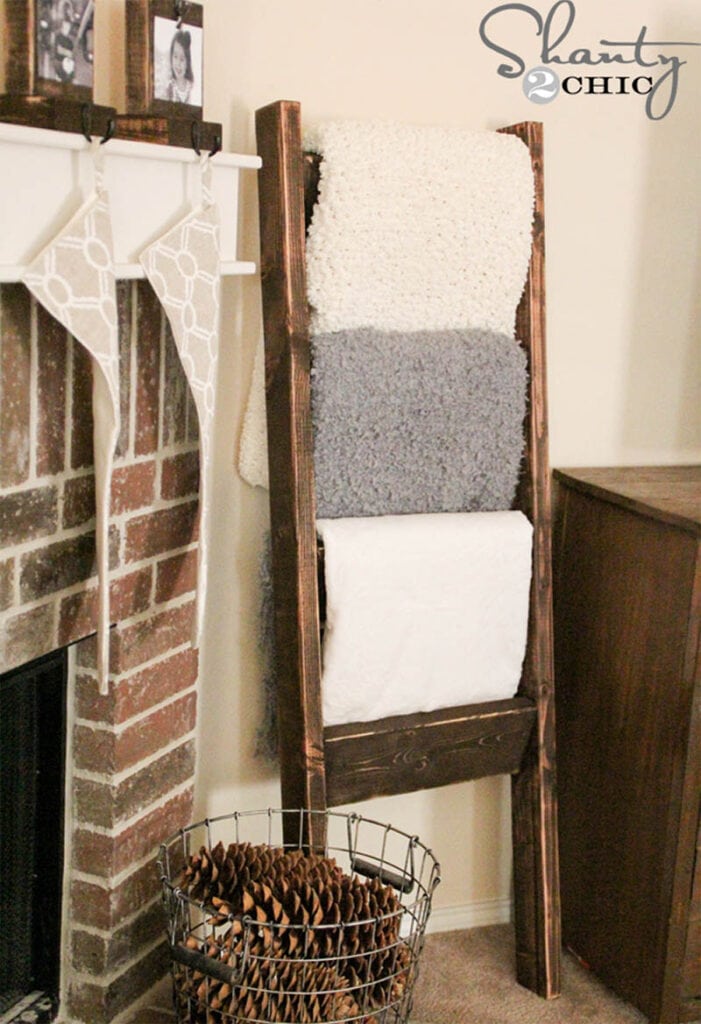
This plan from Shanty 2 Chic will help you build a multi-use ladder with a vintage look. Its four rungs can hold quilts, blankets, mats, towels, or clothing. Really, the only thing you shouldn’t do with this ladder is climb on it.
The pocket hole jig is optional — you can also handle that step with a drill.
- Miter saw
- Pocket hole jig
- Foam brush
- Sander
- (2) 8-foot 2x4s
- (1) 8-foot 2×6
- Pocket hole screws
- Finish
5. DIY Quilt Rack by The Woodcrafter Page

The Woodcrafter Page‘s one-day quilt rack is perfect for filling up a blank spot in any room. All you’ll need is your tools, a few planks of ¾” to 1″ wood, some plugs and screws, and this design.
If you want the rounded top shown in the picture, you’ll need a saw capable of cutting curves; otherwise, a flatter dog-eared design looks just as good.
- Miter saw or table saw
- Bandsaw, jigsaw, or scroll saw (optional)
- Pencil
- Compass
- Power drill
- Screwdriver
- ¾” planking stock
- Dowel plugs
- Screws
6. DIY Blanket Ladder by Imperfectly Polished

This free plan from Imperfectly Polished is another blanket ladder which can be used for both quilt display and several other purposes (again, though, don’t climb any of these). If you measure and cut the ends of the two long planks right, this rack can lean against your chosen wall without wobbling.
- Nail gun
- Drill with ¾” bit
- Clamps
- 10 feet of 1×6 board
- 6 feet of ¾” dowel rod
- Wood glue
- Finish nails
7. DIY Quilt Rack by Instructables
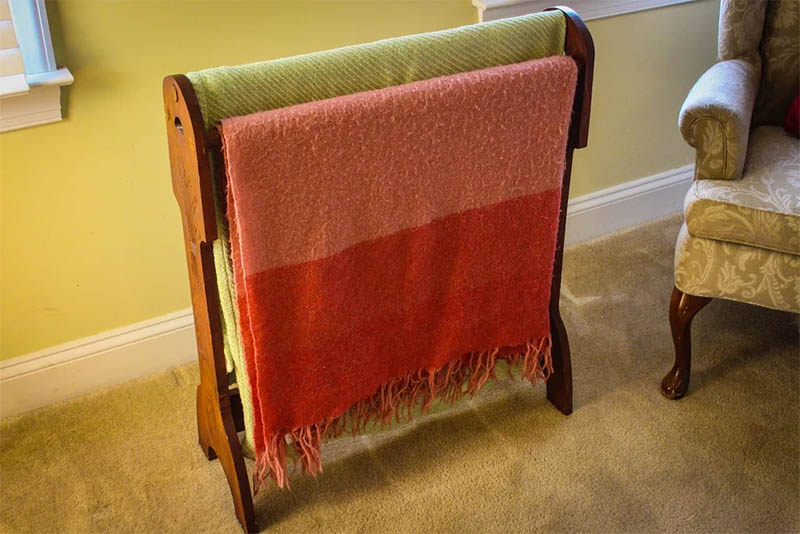
This freestanding quilt rack from Instructables user mtairymd is a great-looking conversation piece — we like how the staggered dowels let you accent one quilt with another. Two side planks, a crossbar, and three wooden rods are all you’ll need to build this.
Side note: this project offers a forgiving environment to practice rounding edges with a jig or band saw.
- Jig, band, or scroll saw
- Drill with 1-inch bit
- Sander
- Tape measure
- T-Square
- Compass
- Pencil
- 1″x12″x5.5″ board
- 1″x4″x28″ board
- 1″x8′ dowel
- Wood glue
- Paint or stain
8. DIY Clothing Ladder by Remove and Replace

Remove and Replace‘s DIY ladder is intended to keep clothes off your floor, but it makes an excellent quilt display as well. The small amount of wood it requires makes this an awesome opportunity to get rid of any leftover scrap lumper from your last project.
- Brush
- Measuring tape
- Clamps
- Handsaw
- Drill with a bit the size of your dowel
- Sandpaper
- (2) 4’ 1x1s
- (2) 6’ 2x2s
- (1) 4’, ½” wide dowel
- Wood glue
- Stain
- Varnish
- Felt pads
9. Simple DIY Blanket or Quilt Rack by Waylight Creations
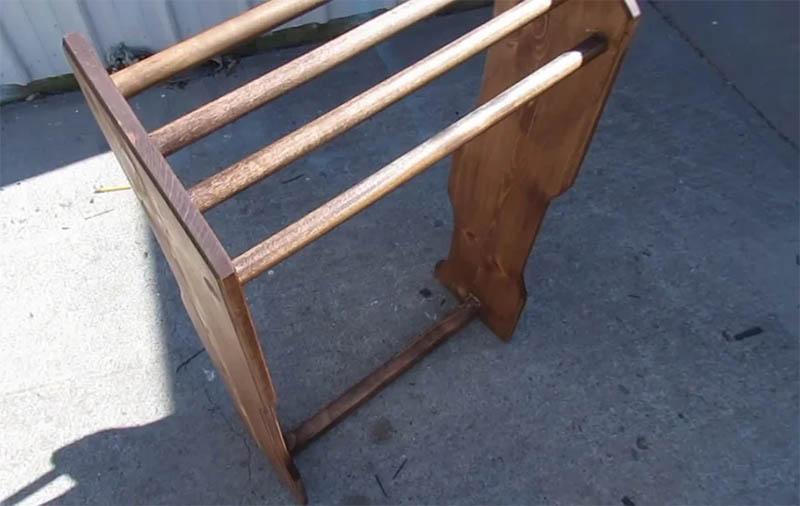
Instructables user Waylight Creations shares this design for a small quilt rack, great for anybody looking to brighten up a tighter space. With just a few dowels and pine boards, and a day of work, you can have all your comfy blankets and quilts within easy reach.
The link includes a video that helps add more context to the instructions.
- Pencil
- Tape measure
- Band saw
- Clamps
- Drill
- Router
- Sander
- Flush cut saw
- Hammer
- Brush
- 1×10 pine boards
- 1” dowels
- Scrap lumber
- Nails
- Wood glue
- Tung oil
- Stain
See Also: 9 Free DIY Pool Cue Rack Plans You Can Make Today
10. DIY Quilt Rack by My Outdoor Plans
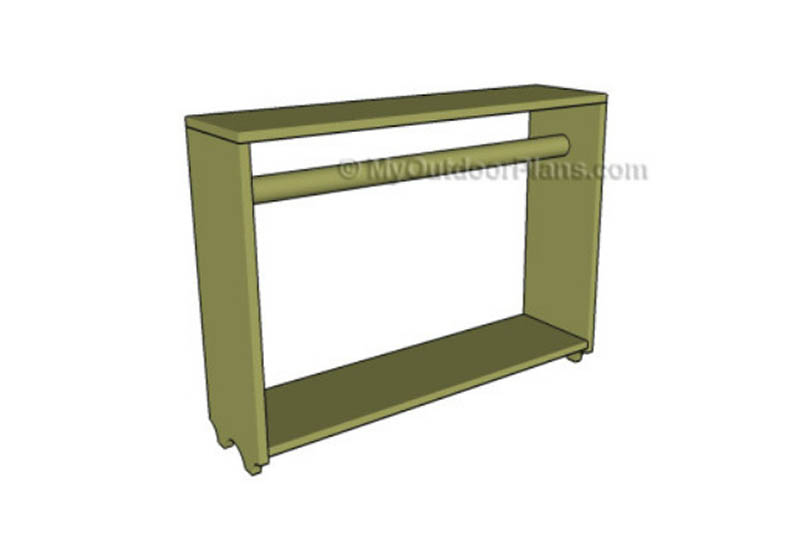
If you’re on the lookout for a smaller quilt rack you can also use as an overflow table, My Outdoor Plans delivers. Unlike Ana White’s design at #3, this plan starts with the framing planks, then adds the dowel as a final step. It’s easy to do — but pre-measuring more than you need is a good idea. (When is it ever not?)
- Hammer
- Tape measure
- Framing square
- Miter saw
- Power drill
- Screwdriver
- Sander
- (2) 26” 1x10s
- (1) 34.5” 1×10
- (1) 36-inch 1×10
- 1” thick lumber rod
11. DIY Bent-Wood Quilt Rack by Woodworking for Mere Mortals
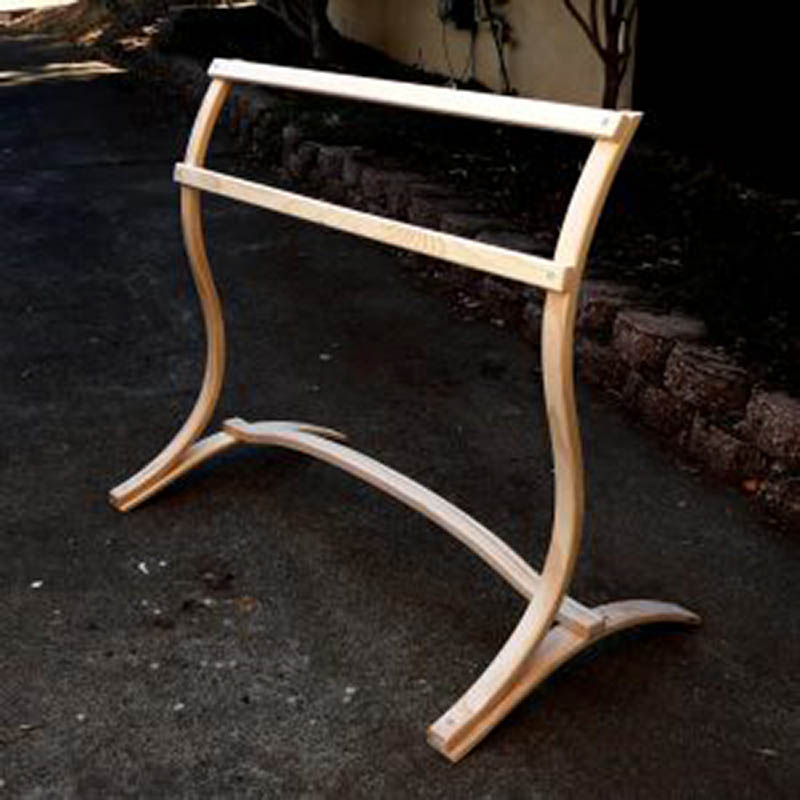
Woodworking for Mere Mortals built a quilt rack with an unusual technique: wood-bending. As the video in that link explains, bending wood into curves leads to a stronger shape than cutting shapes out from a plank — and it’s also less wasteful.
Check out the video to learn how, then download the free template from the same page to build this quilt rack with graceful s-curves.
- Bandsaw
- Pipe clamps
- Glue roller
- Sander
- Drill
- Hammer
- Spray adhesive
- Thin wooden slats
- Wide wooden slats
- Dowels
- Wood glue
- Packing tape
12. DIY Blanket Ladder by Dunn Lumber

Kristen Dunn of Dunn Lumber has designed a beginner-friendly quilt ladder we’re really impressed with. She clearly understands blanket entropy — the way they always, no matter what, end up in a pile on the floor — so this is a blanket ladder you’ll actually want to use.
This design features an extremely quick build, coupled with undemanding tool and supply lists.
- Circular saw
- Power drill
- Tape measure
- Sandpaper
- Brush
- (1) 8’ 2×4
- (1) 8’ 1×3
- Wood screws
- Wood stain
Related Reads:
Featured Image Credit: Scott L. Williams, Shutterstock
Contents

